DIY Dino Dig: Make Your Own Excavation Kit For Kids!
Want to unlock hours of educational fun for your kids? DIY dinosaur excavation kits are the perfect blend of creativity, learning, and hands-on excitement, fostering a love for paleontology and scientific discovery right in your own home.
Forget the expensive store-bought versions, creating your own dinosaur excavation kit is surprisingly easy and significantly cheaper. It's a fantastic activity for a rainy day, a birthday party, or simply a fun way to spend quality time with your children. Not only does it ignite their imagination, but it also helps develop their fine motor skills, problem-solving abilities, and patience. Imagine the thrill on their faces as they carefully chip away at the hardened "earth" to reveal a hidden prehistoric treasure!
The beauty of a DIY approach lies in its customization. You can tailor the kit to your child's specific interests and age level, choosing the types of dinosaurs, the complexity of the excavation process, and even adding extra elements like "fossil" imprints or geological tools. So, how do you embark on this prehistoric adventure?
- Unlock The Secrets Of Harold Goulds Iconic The Sting Performance
- Unveiling Linda Tripps Net Worth At Death Surprising Revelations
| DIY Dinosaur Excavation Kit Essentials | Details |
|---|---|
| Concept | A hands-on activity where children excavate toy dinosaurs from a homemade block, simulating a paleontological dig. |
| Skills Developed | Fine motor skills, problem-solving, patience, scientific curiosity. |
| Customization | Adaptable to different age groups and interests. You can choose specific dinosaurs and complexity levels. |
| Cost-Effective | Generally cheaper than buying pre-made kits. |
| Ideal For | Rainy days, birthday parties, educational activities, family time. |
| Materials | Various options include: Plaster of Paris, flour, salt, coffee grounds, sand, clay, water, food coloring, small toy dinosaurs, and tools. |
| Recipe Example 1 | 2 cups flour, 1 cup salt, 1 cup water, dinosaur toys. Mix ingredients, mold around toys, bake or air dry. |
| Recipe Example 2 | Plaster of Paris, water, sand, dinosaur toys. Mix plaster, add sand, pour into a mold with toys, let harden. |
| Tools | Small brushes, plastic chisels, toothpicks, magnifying glass (optional). |
| Age Appropriateness | Varies depending on complexity. Simple kits for younger children, more challenging ones for older kids. |
| Educational Value | Introduces basic concepts of paleontology, geology, and scientific investigation. |
| Safety Considerations | Supervise children to avoid ingestion of materials. Ensure tools are age-appropriate and used safely. |
| DIY Level | Easy to Medium |
| Reference Website | Science Kids |
Let's delve into the process of crafting these captivating excavation kits, exploring different methods and materials to achieve the perfect paleontological experience for your budding scientists.
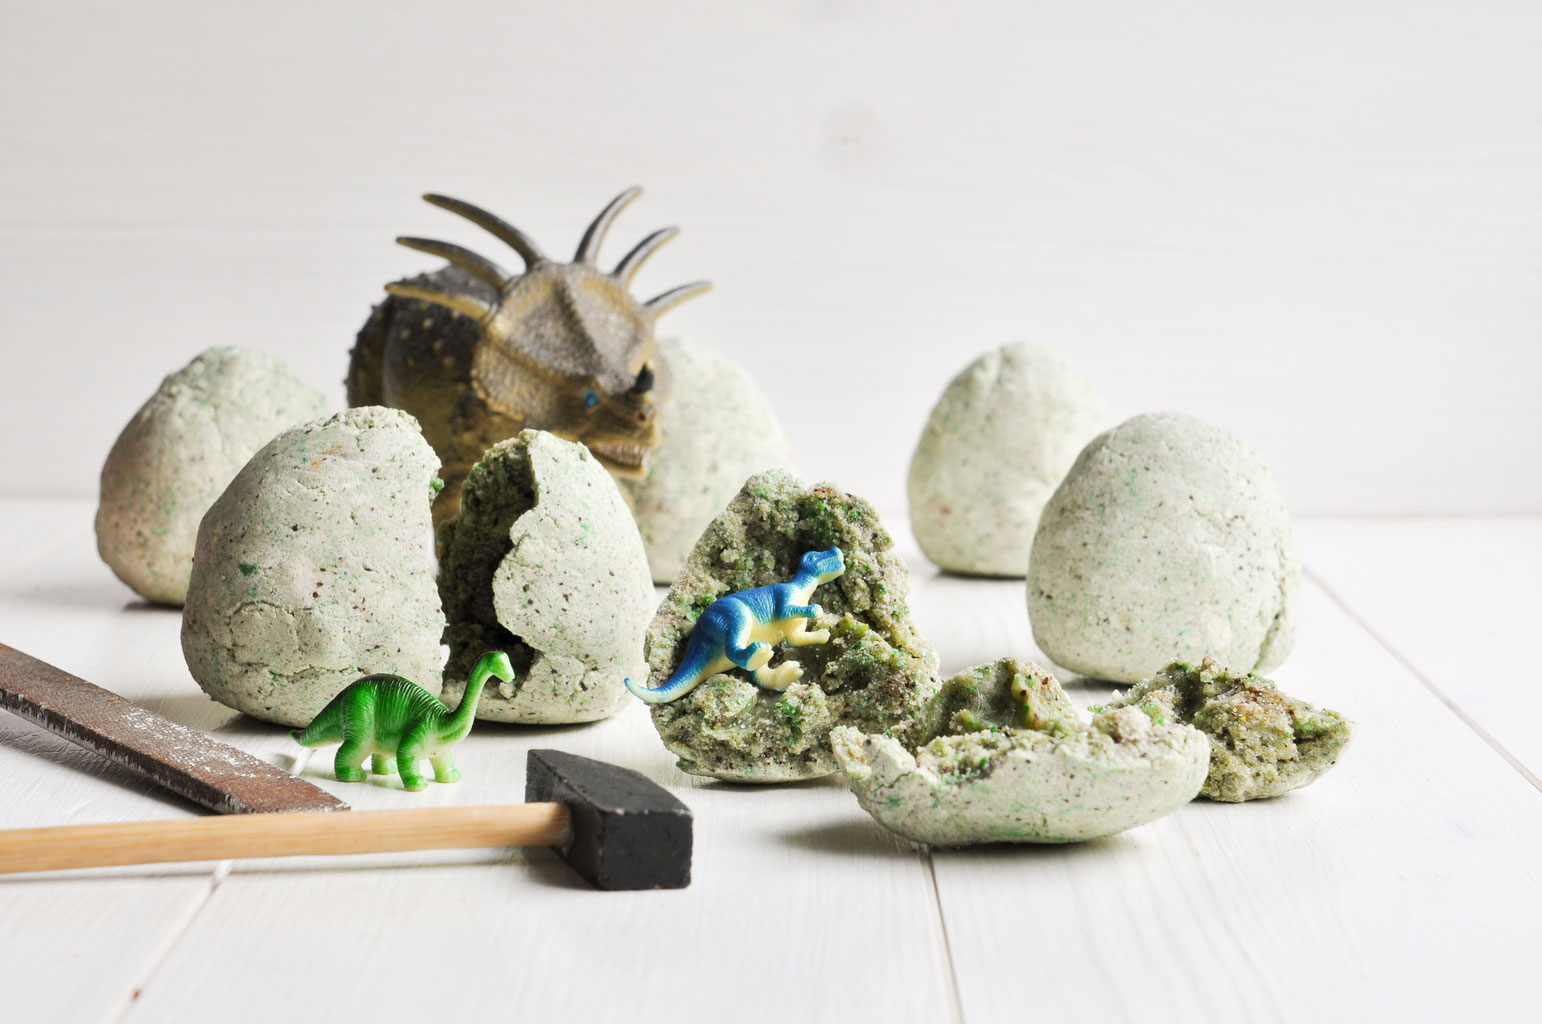
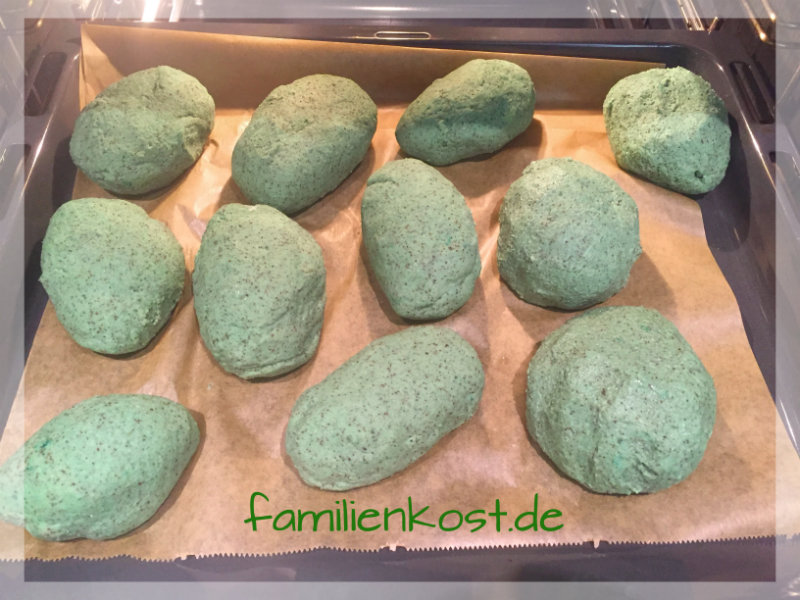
One of the simplest recipes involves ingredients you likely already have in your pantry: flour, salt, and water. Combine two cups of flour with one cup of salt, gradually adding water until you achieve a dough-like consistency, similar to pizza dough. Knead the mixture well. Then, form a round, flat disc in your hand. Now comes the exciting part: place your chosen dinosaur toy in the center of the dough, ensuring no plastic parts are sticking out. Carefully wrap the dough around the dinosaur, completely encasing it. You can then either bake the "egg" in a low oven (around 200°F or 93°C) for a few hours until hardened, or simply let it air dry for a day or two. Voila! You have a dinosaur egg ready for excavation!
Another popular method utilizes plaster of Paris. This creates a more realistic, stone-like excavation block. Mix the plaster according to the package directions, and for an added touch of authenticity, stir in some sand. Pour the mixture into a mold (a plastic container or even a balloon works well), place your dinosaur toy inside, and allow it to harden completely. Remember to grease the dinosaur with a little oil before embedding it in the plaster; this makes the excavation process slightly easier and prevents the plaster from sticking too tightly to the toy.
- Unveiling Laila Navarro A Political Trailblazers Journey To Congress
- Uncover The Enigmatic Brilliance Of Actress Mare Winningham
For a sensory experience, consider adding coffee grounds to either the flour-salt dough or the plaster mixture. The coffee grounds not only add a realistic earthy color but also a pleasant aroma. Green food coloring can also be incorporated for a more visually appealing "fossil".
If you're looking for a no-bake option, try using modeling clay or even a sand-starch mixture. For the sand-starch eggs, you'll need approximately half a cup of cornstarch, one cup of sand, and two tablespoons of water. Mix the ingredients together, form an egg shape around the dinosaur, and let it dry completely. This method results in a more crumbly excavation experience, perfect for younger children.
Once your excavation blocks are ready, the real fun begins. Provide your children with an array of "paleontological" tools: small brushes, plastic chisels, toothpicks, and even magnifying glasses. Encourage them to carefully chip away at the surrounding material, patiently uncovering their hidden dinosaur. This is a great opportunity to teach them about the work of paleontologists and the importance of careful observation and documentation.
Safety is paramount, especially when dealing with small children. Supervise them closely to ensure they don't ingest any of the excavation materials. Choose age-appropriate tools and teach them how to use them safely. You might even consider providing safety goggles to protect their eyes from dust and debris.
These DIY dinosaur excavation kits are not just a fun activity; they are a valuable learning experience. They introduce children to the fascinating world of paleontology, encourage problem-solving skills, and foster a love for science and discovery. So, gather your materials, unleash your creativity, and embark on a prehistoric adventure with your little ones!
The options are truly endless when it comes to personalizing these kits. You can create different types of "fossils" by pressing leaves or shells into the dough or plaster before it hardens. You can even add "geological" layers by pouring different colored mixtures into the mold in stages. Consider hiding multiple dinosaurs within a single excavation block for an added element of surprise.
For a dinosaur-themed party, these DIY excavation kits make fantastic party favors. Simply prepare the kits in advance and let each child excavate their own dinosaur during the party. You can even create a "paleontology station" with different excavation blocks and tools for the children to explore. Add magnifying glasses for closer inspection, and provide small notebooks and pencils for them to record their "discoveries". This activity encourages interaction, collaboration, and sparks imaginative play amongst the children.
Think about adding educational elements. Print out fact sheets about the specific dinosaurs hidden in the kits. This can spark conversations and help them learn about different species, their habitats, and their diets. You can even turn it into a quiz game afterward to reinforce their knowledge.
For an extra challenge, create a "frozen excavation kit." Simply prepare your chosen mixture (flour-salt dough or plaster), embed the dinosaur, and then place the entire block in the freezer overnight. The frozen block will be significantly harder to excavate, providing a more challenging and time-consuming activity, especially suitable for older children.
When choosing the dinosaur toys, consider the size and material. Smaller dinosaurs are easier to embed in the blocks, but larger dinosaurs provide a more dramatic reveal. Avoid using dinosaurs with small, detachable parts that could pose a choking hazard for younger children. Rubber or plastic dinosaurs are generally the best choice, as they are durable and easy to clean.
Don't underestimate the power of presentation. Wrap each finished excavation block in brown paper or burlap to give it an authentic "fossil" look. Tie it with twine and attach a small tag with the name of the dinosaur hidden inside. This adds an extra layer of excitement and anticipation for the young paleontologists.
The cleanup after the excavation can be a bit messy, so be sure to protect your work surface with newspaper or a plastic tablecloth. Provide your children with damp cloths or sponges to wipe down their tools and dinosaur discoveries. Consider setting up a designated "excavation zone" in your backyard or on a patio to minimize the mess indoors.
Another fun variation involves creating "amber" fossils. Melt clear or amber-colored hard candies in a saucepan over low heat. Carefully pour the melted candy into a small mold, embed a miniature dinosaur inside, and let it cool completely. The resulting "amber" fossil provides a unique and visually appealing excavation experience. However, exercise caution when working with hot candy, and always supervise children closely.
For a more eco-friendly approach, consider using recycled materials to create your excavation kits. Instead of buying new plastic containers, use empty yogurt cups or margarine tubs as molds. Shredded paper or dried leaves can be mixed into the flour-salt dough or plaster mixture to add texture and visual interest. This teaches children about the importance of sustainability and resourcefulness.
The beauty of DIY dinosaur excavation kits is that they can be adapted to suit any budget, skill level, or interest. Whether you're using simple pantry staples or more specialized materials, the end result is always the same: hours of fun, learning, and imaginative play for your children. So, embrace your inner paleontologist, gather your supplies, and get ready to unearth some prehistoric treasures!
Another fascinating twist is creating edible excavation kits! Use chocolate cookie dough as the base and embed gummy dinosaurs inside. After baking, the kids can "excavate" their gummy finds with spoons. It's a sweet treat and a fun activity all in one! Just be mindful of any allergies before creating edible kits.
Consider incorporating a "mystery element" into your excavation kits. Before embedding the dinosaur, write a small riddle or clue on a piece of paper and wrap it around the toy. The riddle could relate to the dinosaur itself, or it could lead to a hidden treasure or reward. This adds an extra layer of excitement and encourages critical thinking skills.
If you are using plaster of Paris, try adding a few drops of essential oil, such as lavender or chamomile, to the mixture. This will create a soothing and calming aroma during the excavation process. Just be sure to choose essential oils that are safe for children and use them sparingly.
For a more challenging excavation experience, try burying the dinosaur in a combination of different materials, such as plaster, clay, and sand. This will require children to use different tools and techniques to uncover the hidden toy. It also provides a more realistic representation of how fossils are found in nature.
To make the excavation process more engaging, create a "paleontology lab" in your home. Set up a table with different excavation kits, tools, magnifying glasses, notebooks, and pencils. Add posters of dinosaurs and maps of fossil dig sites. Play some ambient music or nature sounds to create an immersive atmosphere. This will encourage children to fully embrace their role as paleontologists.
After the excavation is complete, encourage children to clean and examine their dinosaur fossils. Provide them with a soft brush and some soapy water. This will help them appreciate the details of the toy and learn about the different features of the dinosaur. They can also use magnifying glasses to get a closer look at the textures and patterns on the toy.
Another great idea is to create a "fossil identification chart." Print out pictures of different dinosaurs and their corresponding names. After the excavation is complete, have children match their dinosaur fossils to the pictures on the chart. This will help them learn about different dinosaur species and their characteristics.
Consider making multiple excavation kits with different dinosaurs and materials. This will allow children to compare and contrast the different fossils and excavation techniques. They can also trade fossils with each other and create their own dinosaur collections.
For older children, you can introduce the concept of stratigraphy, which is the study of rock layers and their relationship to time. Create excavation kits with multiple layers of different colored materials, each representing a different geological period. This will help children understand how fossils are formed and how scientists use stratigraphy to date them.
Encourage children to document their findings in a "paleontology journal." They can write about their excavation experiences, draw pictures of their fossils, and record any interesting facts they learn about dinosaurs. This will help them develop their writing skills and reinforce their learning.
Remember to have fun and let your creativity guide you. The most important thing is to create a positive and engaging learning experience for your children. With a little imagination and effort, you can turn your home into a prehistoric paradise.
Finally, don't forget to take pictures and videos of your children's excavation adventures. These memories will last a lifetime, and you can share them with friends and family on social media. You can even create a slideshow or movie to showcase your children's paleontological discoveries.
- Unveil The Truth Jeff Hardys Marital Status Revealed
- Unveiling Tony Balkissoons Ethnicity Discoveries And Insights
Selbst gemachte Dino Eier. Zum Ausgraben. mix dich glücklich
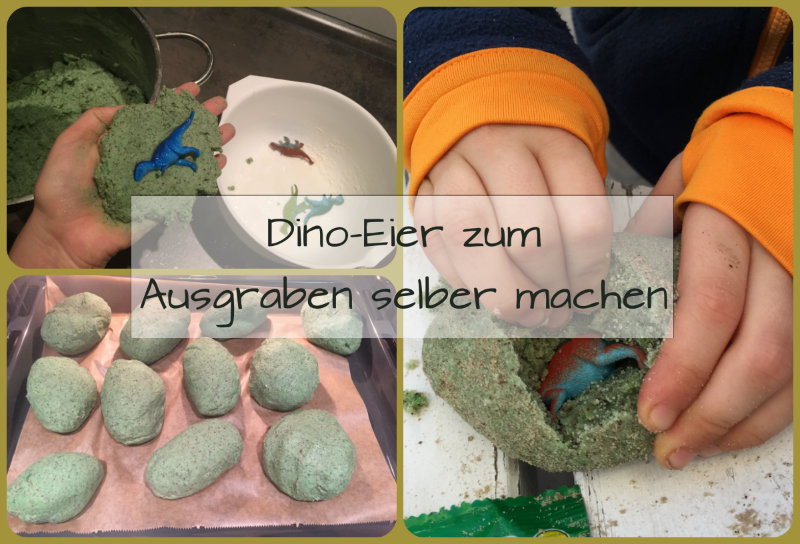
Dino Ei zum Ausgraben selber machen
Dino Ei zum Ausgraben selber machen
